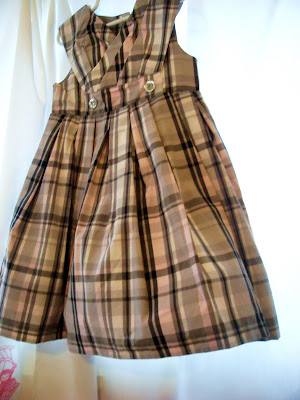
It all started when I found this dress for Eliana at a Gymboree... it was marked down, but it wasn't marked down steeply enough to justify my purchase of something she wouldn't wear that often, unless... I could use it for her birthday. (Clothing often seems to be a jumping off point for birthday party themes for whatever reason.) I bought it!
Then I needed to dream up a theme to go around it. Fortunately, this wasn't difficult since Eliana is very into tea parties. So much so, that most days I wake up to "breakfast in bed." (She's also into waking up way too early in the morning.)
So, a tea party theme it was. I found a cute little tea cup for the invite from the Graphics Fairy, and got to work with Publisher (no, I have no idea how to use Photo Shop- that's my sister's territory).
I found most of the supplies I needed on Saturday except for gray ribbon and gray square envelopes. My mom suggested I make my own envelopes since I hadn't been able to find what I'd wanted there (or online), and I decided to look for ribbon elsewhere.
However, this is what it looks like outside my front window and I'm going no where.
Fortunately for me, I remembered that I had a stash of silk ribbons from my granny and found some white.
I decided I'd dye it using boiling water and an old black t-shirt I had on hand.
The water didn't turn as dark as I had hoped, and then I remembered that Eliana is an expert at dyeing her clothes and so I decided to use the same technique.
Then, I remember that it's not best to try to dye something on top of a favorite tablecloth.
In the end, it did turn gray... can you tell the difference? It's not a substantial difference, but it was better than the alternative of braving the elements.
For the envelopes, I found this tutorial but realized it was to help sell a product that I didn't want to buy... maybe if I was making envelopes everyday. So I had to improvise quite a bit. I'm not going to say this is the best way, but it seems to work pretty well for me.
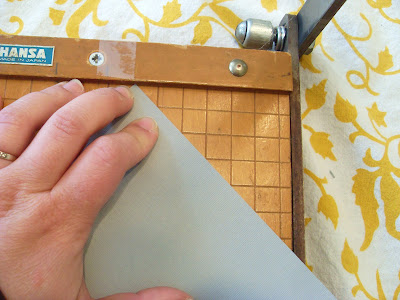
Take the corner of a square paper and position it on your paper cutter for half the width you want your envelope to be. Then align the edge of your paper so that you're cutting the grid squares in half diagonally.
Nick the paper. Then rotate to do all four sides. Then flip your paper over and do the same thing again. You should end up with 8 nicks on your paper.
Use the nicks to guide folding your paper. I used the back of a spoon to get clean folds because I don't own a bone folder. It seemed to get the job done.
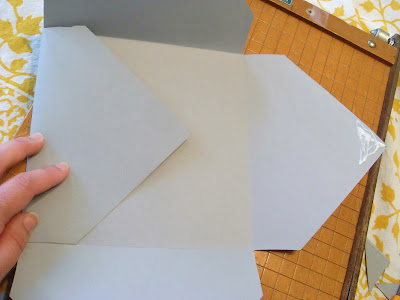
Cut the extra triangles of paper out after you've made all four folds.
Your paper should look something like this.
Fold over one corner, and put glue in the corner of the opposite corner before folding on top.
Glue around the edge of the bottom corner then fold up and your envelope is ready for a card.
Here's mine... it was pretty simple to create (if you aren't dyeing ribbon): a round of paper on top of a doily with a decorative ribbon on top.
I guess I'll be addressing envelopes sometime soon! Have a lovely evening!


2 comments:
Cute, Bethany! I can't wait to get it in the mail. :)
That dress is adorable! What a sweet part you will have for your little girl! I love tea parties!
Post a Comment